
|
Production Forecast is a special functionality able to read and manage data from various weather forecast services taking into account geodetic data of real wind turbines (i.e. latitude, etc.). Retrieved weather forecast information normally includes such general data as wind speed, wind direction, outdoor temperature, etc. Based on this data and taking into account power curve values, MiScout SCADA is able to make predictions as to possible power production in the nearest future (e.g. four days, etc.) for real wind turbines.
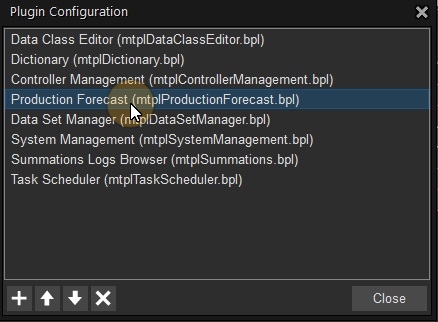
To be able to create and configure production forecast in MiScout Desk, first thing you require is the Production Forecast (mtplProductionForecast.bpl) plug-in.

Therefore, first of all, make sure that the required plug-in is already listed in the Plugin Configuration dialog. If this plug-in is available, the Production Forecast tab will appear on the main application ribbon. In case the required plug-in is not on the list, you can easily upload it. For more detail information, refer to Configuring Plug-ins.
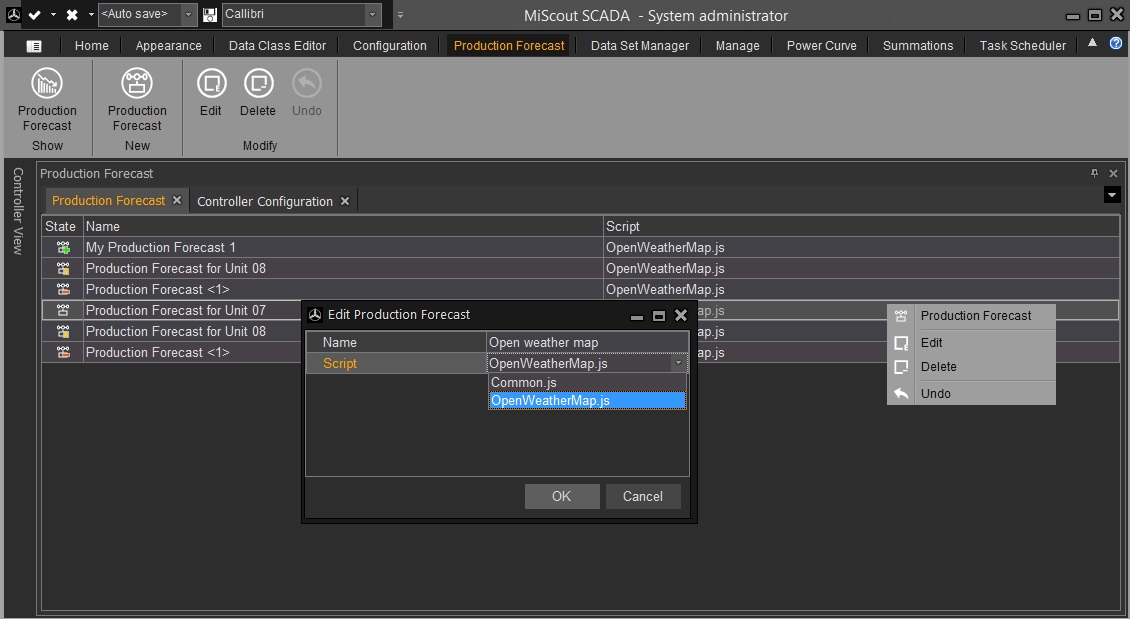
As soon as the required plug-in is loaded, the Production Forecast tab appears on the main application ribbon. On clicking this tab on the ribbon, you can reach its toolbar containing the Production Forecast icon. Therefore, click the Production Forecast icon accessible in the Show section on the toolbar to open the Production Forecast main window. In the revealed Production Forecast window all available production forecasts will be displayed.

Creating new production forecast
New production forecasts can be created and configured in the Production Forecast window. To do this, press the Production Forecast icon accessible in the New section of the toolbar. Alternatively, right-click within the Production Forecast panel to open the context-menu and select the Production Forecast option. As a result, the Edit Production Forecast dialog will appear within the main monitoring area. By making proper settings in the revealed dialog window users can configure the production forecast properties.
Important Note. Please keep in mind, that "OpenWeatherMap.js" is an example of the custom script created beforehand and available in MiScout by default. If required, users can create and configure their own forecast scripts based on "OpenWeatherMap.js". Fore more detail information, refer to the Forecast Scripts section described in the Scripts View chapter.
On making all proper settings, press the OK icon to finish the configuration process. If done successfully, the recently created production forecast will be on the list in the Production Forecast window. A new production forecast icon can be easily recognized on the list by its icon marked green, meaning that it hasn't been saved to the database yet. Therefore, for the new production forecast to be saved to the database, click the  Commit Changes icon at the left top corner of the main application window. As a result, all user's recent settings will be immediately saved to the database. Otherwise, you can withdraw these changes by clicking the
  Rollback Changes icon.
By default, MiScout Desk can calculate production forecast based on weather forecast information obtained from the following sources:
Provides hourly forecast for 48 hours. Allows 1000 requests per day. Registration is required.
Provides 3 hours forecast for 5 days. Allows 60 requests per minute. Registration is required.
Provides hourly forecast for 12 hours. Allows 50 requests per day. Registration is required.
Provides hourly forecast for 48 hours. Allows 75 requests per hour. Registration is required.
All the services mentioned above, are provided as an example only. These weather services are free of charge and can be used in the configuration as described earlier in this chapter.
Modifying available production forecasts
If required, a user can easily change the properties of available production forecasts. To do this, simply double-click the required production forecast on the list to open the Edit Production Forecast dialog. Also, you can select one of the production forecasts by clicking it and press the Edit icon found in the Modify section on the toolbar.

Alternatively, right-click the prior selected production forecast to open the context-menu and select the Edit option. As a result, the Edit Production Forecast dialog will appear within the main monitoring. On making all required settings in the revealed dialog window, press the Ok button. User can easily recognize a modified production forecast in the list by its icon marked orange, meaning that changes for the current production forecast haven't been saved to the database yet.
To quickly withdraw recent changes, use the Undo icon in the Modify section on the toolbar or the Undo option in the right-click context-menu.
For the recently edited production forecast to be saved to the database, click the  Commit Changes icon at the left top corner of the main application window. As a result, all your recent settings will be saved in the database. Otherwise, you can withdraw these changes by clicking the
  Rollback Changes icon.
The workaround for deleting available production forecasts is very similar to the one described for modifying them (see Modifying available production forecasts above).
Therefore, to remove the production forecasts from the database, select it in the list and press the Delete icon found in the Modify section on the toolbar. Alternatively, right-click it to open the context-menu and select the Delete option. As a result, a red icon will appear next to the production forecast icon meant for removal. The Undo icon in the Modify section on the toolbar or the Undo option in the right-click context-menu allows users to quickly reject production forecast deletion.
To proceed with production forecast removal, click the  Commit Changes icon at the left top corner of the main application window. As a result, the production forecast will be eventually removed from the database and will disappear from the main window. Otherwise, you can cancel the deletion by clicking the
  Rollback Changes icon.
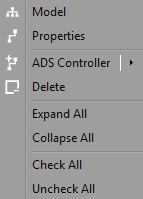
On creating a production forecast, the next thing to do is assigning it to the target controller. To access controller properties, right-click the required unit in the Controller View panel and select the Properties option in the menu.

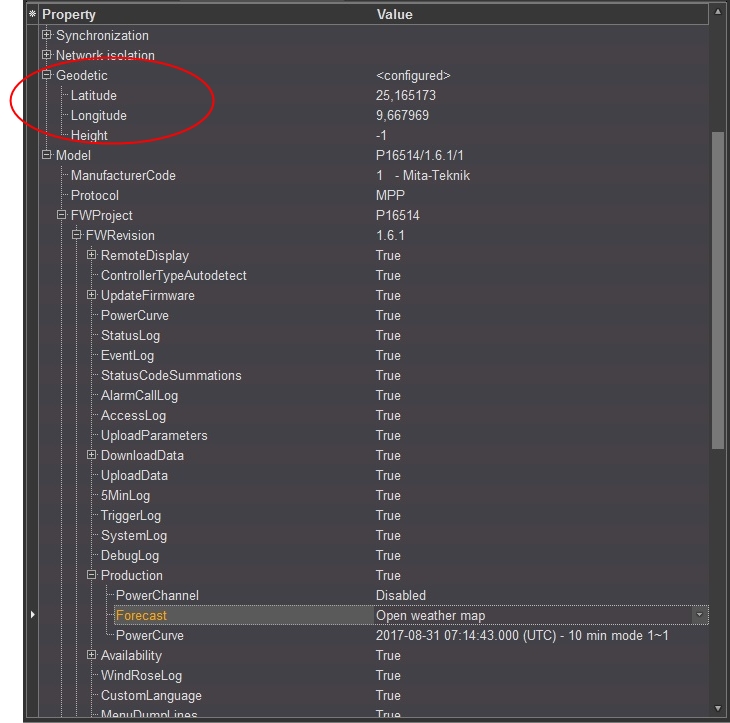
As soon as you access the controller properties, expand the following nodes: Model -> FWProject -> FWRevision -> Production as shown in the screen below.

Important Note. Make sure, that geographical coordinates (i.e. latitude, etc.) are available for the target controller under the Geodetic node (see the screen above). Based on geodetic data the system is able to retrieve more accurate weather forecast data for the real wind turbines on sites.
To proceed, make proper settings for the properties revealed under the Production node:
Note. To have power curves appear as options in the PowerCurve property field, a user has to initiate power curve generation beforehand. For more detail instructions, refer to the Power Curve chapter.
For the system to retrieve data from weather forecast services as well as saving it to the database, a special service task is required. For more detail instructions on how to create a Production forecast task, refer to Production Forecast described in the Service Actions chapter.