
|
Thresholds in MiScout SCADA can be used for several purposes, including
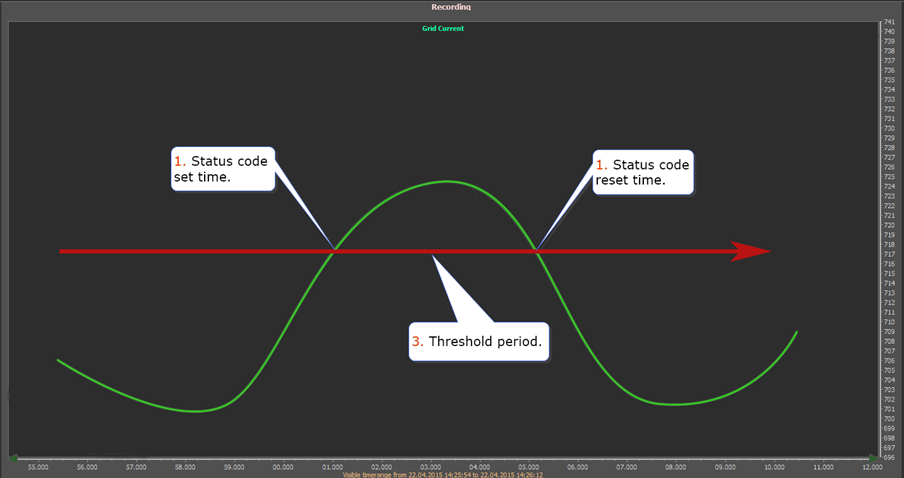
Usually, when the threshold condition gets valid, it is fired provoking some configured action to take place (i.e. status code setting/resetting, alarm generation and acknowledgment, etc.). The picture below shows how a threshold will "react", when its pre-configured condition becomes true
Simple threshold "behavior"
However, on configuring threshold advanced properties, its usual behavior will be different.
Threshold "behavior" on configuring advanced properties
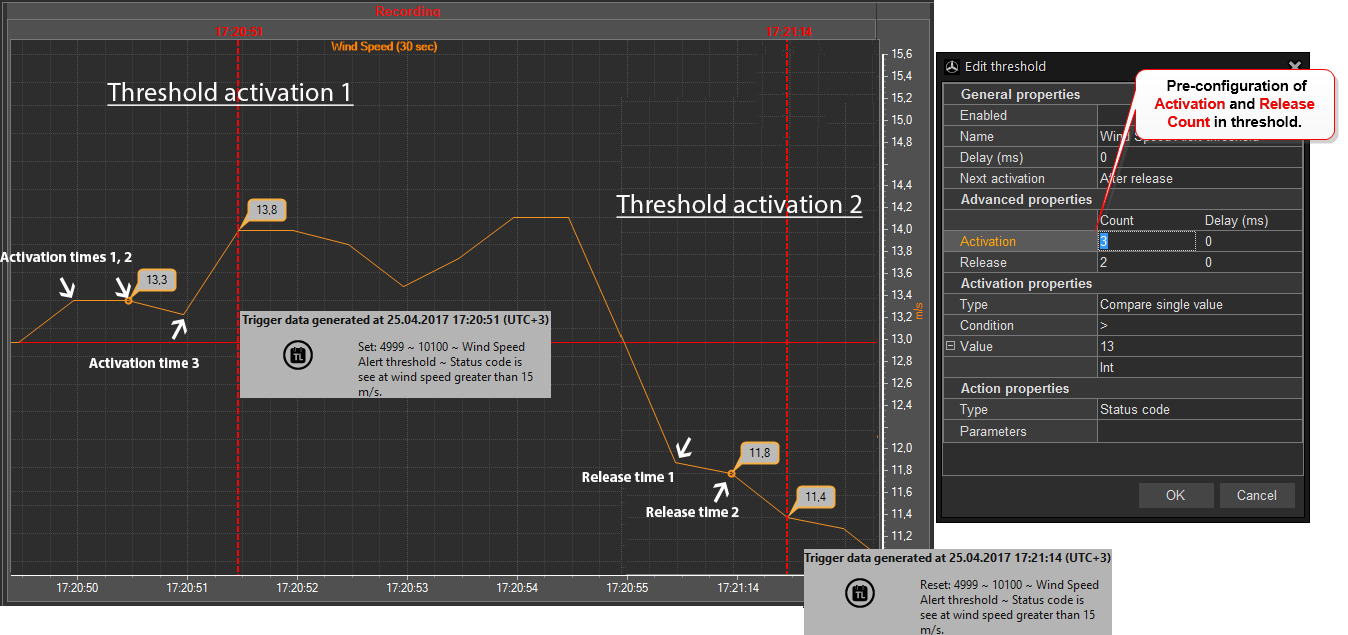
The screen above illustrates how behaves a threshold after setting its Advanced properties by entering proper values in the Count cells next to Activation and Release fields:
Therefore, based on our configuration (see the screen above), the threshold will be activated right after its condition has become true for 3 times. You remember, of course, that we've set Activation to 3 in the threshold configuration dialog. Activation of the configured threshold will be followed by status code setting, as this is a configured action for the current threshold.
Next, after a threshold condition hasn't been valid for 2 times (we've set the Release value to 2), another action - status code resetting will be performed by the system.
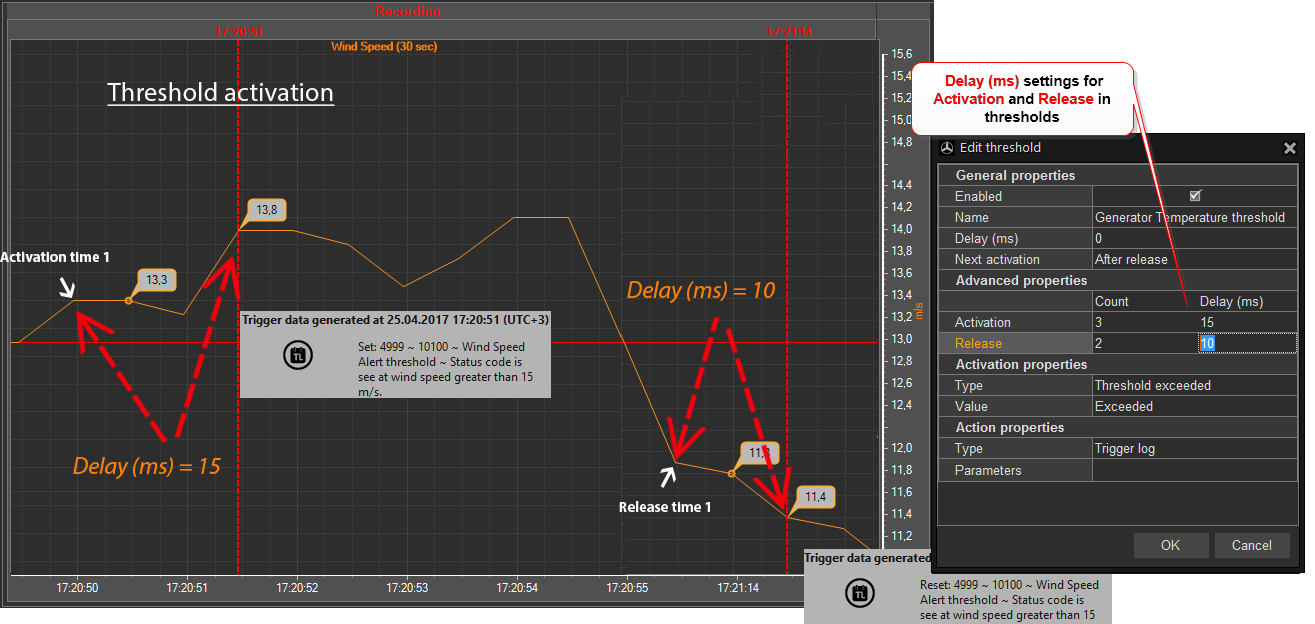
To configure some additional conditions for threshold activation we can also use the Delay (ms) cells next to Activation and Release fields. On configuring these properties, some additional conditions have to be fulfilled prior the threshold is fired.
The screen below demonstrates, that the threshold gets activated after all configured conditions have been fulfilled:
Condition1 - number of activation and release times coincide with settings made in the Count fields of the current threshold and
Condition 2 - configured time periods configured in the Delay (ms) fields have elapsed.
Note. Advanced properties can be configured for all threshold types except for Always execute.
Further in this section we will instruct a user on how to create and configure thresholds by setting different conditions based on user's needs.
1. To add a new threshold, first click to open the Data Set Manager tab on the main ribbon.
2. Afterwards, select the required data item in the Data sets panel to the right.
3. Click the ![]() Threshold icon in the New section on the toolbar to create a new threshold.
Threshold icon in the New section on the toolbar to create a new threshold.
As a result, you will see the revealed Edit Threshold dialog window providing a possibility to configure General properties, Advanced properties, Activation properties and Action properties for the threshold:
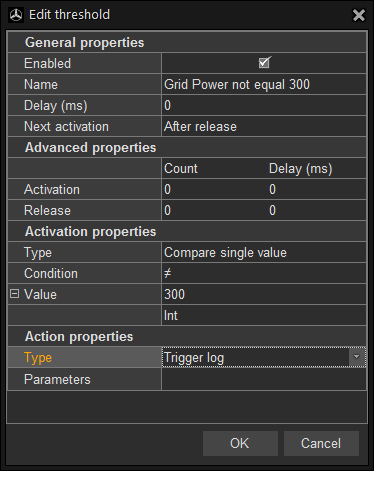
General properties
In the Activation properties section a user can define the primary condition for threshold activation by selecting a proper Type of the threshold listed in the drop-down menu:
Important Note.. Always execute must be used very carefully, as selecting this option for the threshold with a complicated condition could have a negative influence on the overall system performance.
In case, Compare Single Value is set in the Value property field, then a user has to specify the condition for the threshold in the Condition property field. If the selected type is Compare value ranges, then you also have to specify the condition like either In range or Out of range.
Action properties
When simple conditions are specified for generating thresholds (e.g. status code setting, etc), it is recommended to select one of the following options in the Type property field.
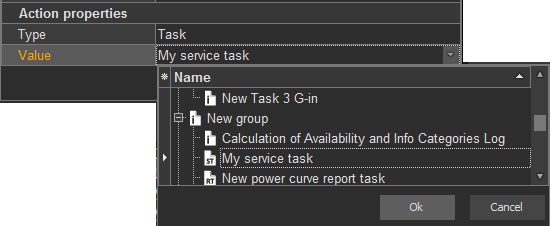
However, in case some more complicated conditions are applied for threshold generation, the configuration process differs. In this case, specifying of corresponding scripts in the Value field is strongly recommended.
Therefore, on selecting the appropriate script option available in Value, the "three dots" icon will be activated in the Edit threshold dialog. On clicking the "three dots" icon, the Edit Trigger.jsscript window will open allowing you to change the properties of prior selected script.
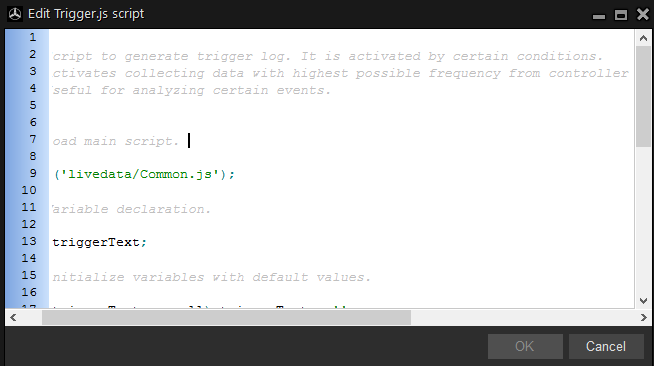
For more detail information on configuring scripts, refer to the Scripts View section of this manual.
To proceed with the threshold configuration on selecting Execute Script, click ![]() to reveal the Edit Script window.
to reveal the Edit Script window.
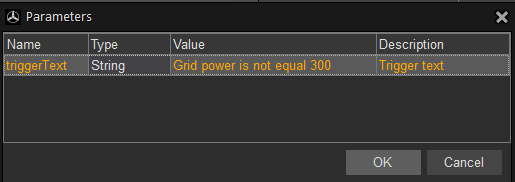
When option Execute Script is selected (see Step 3), the appropriate dialog allows entering the script parameters. Script parameters depend on the prior selected script.
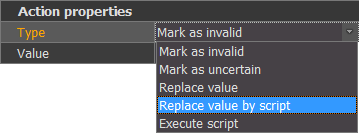
If you want to Replace value by script click ![]() to reveal the Edit Script window again. Click OK when the editing is already done.
to reveal the Edit Script window again. Click OK when the editing is already done.
As soon as the configuration is finished, all recently created thresholds will be listed in the Thresholds panel at the bottom of the main screen.

Please note, that icons of new thresholds are marked green. Therefore, to save all configuration changes, click  Commit Changes at the top left corner of the main screen.
Some thresholds can be assigned the Threshold exceeded type with the following options available in the Value drop-down list:
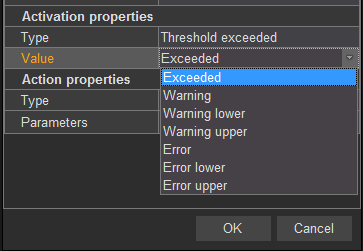
Note. Unlike Warning, Alert, Warning lower, etc. options, on selecting Exceeded, the threshold will be able to verify conditions configured both for Warning and Alert mapping fields.
To see such kind of a threshold in action, refer to Configuring a threshold to show exceeding of Warning and/or Alert values.
Assigning a threshold to a data item
To enable execution of thresholds, they have to be assigned to the corresponding data item belonging to a specific data set. For more detail information on assigning thresholds to the data set and controller, refer to the Configuring Thresholds for SCADA Logs Monitoring section.
The workaround of assigning thresholds to the data item listed under the data set node is described below.
1. To begin with, go to the Data sets panel to the right and click the required data set to reveal the list of available data items. For example, we will select the data set called "Log: Status" and the data item called "Wind speed.
2. Next, select the threshold in the Thresholds panel and using drag-and-drop move the threshold to the Data sets panel to the right and locate it under the prior selected data item. In our case, we will select the threshold called "Wind speed too low".
3. Finally, click  Commit Changes to save assigning of the threshold.
If done successfully, the threshold will be listed under the selected data item, belonging to the prior selected data set. As a result, the screen below shows the Wind speed too low threshold assigned to the Wind speed data item located under the Log: Status node.
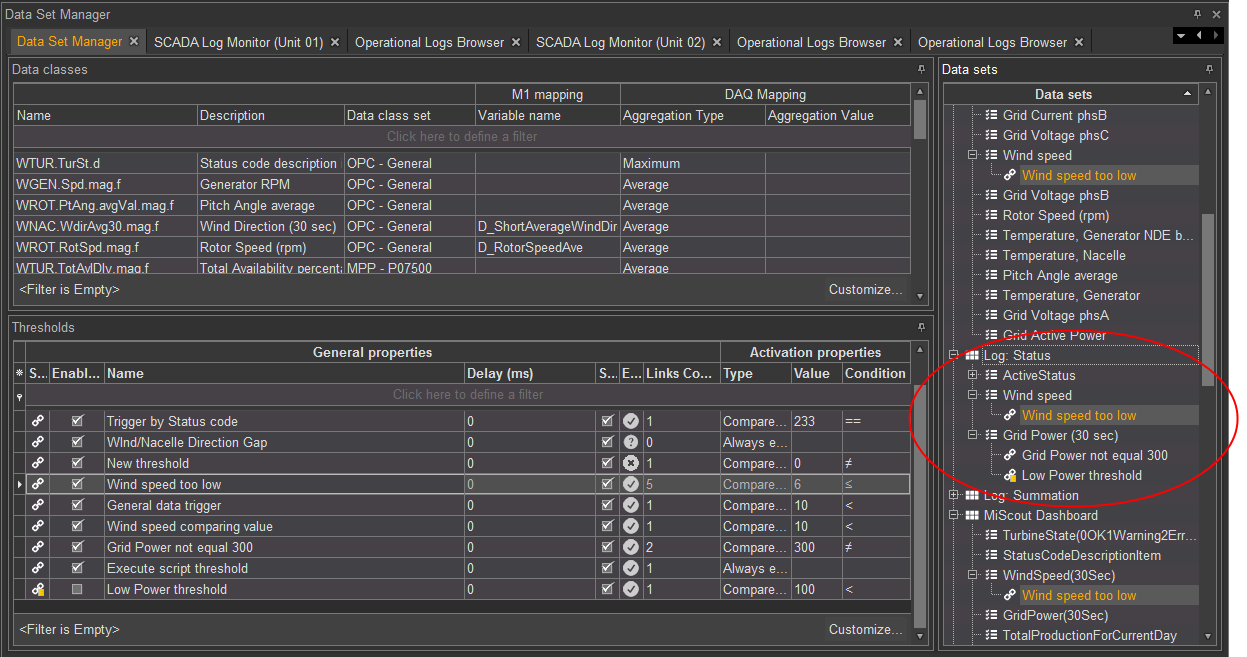
If required, you can assign one and the same threshold to a number of data items located under different data set nodes. Therefore, to see all data items, to which the threshold has been assigned, just select it by clicking the threshold ![]() icon. For example, lets' click the
icon. For example, lets' click the ![]() Wind speed too low threshold icon. As a result, the Data sets panel will show all data items, to which the selected threshold has been assigned.
Wind speed too low threshold icon. As a result, the Data sets panel will show all data items, to which the selected threshold has been assigned.
Furthermore, in the Links Count column of the Thresholds panel (at the window bottom) you can see the number of data items to which the specific threshold is currently assigned. In our specific case, the Wind speed too low threshold is currently assigned to 5 data items. Whereas rest thresholds on the list are assigned to one data item only. In the meanwhile, one threshold is not assigned to any data item showing 0 in the Links Count column.
Normally, there' no need to have all the thresholds on the list executed. In this case, you can exclude some thresholds from being executed by deselecting the Enabled check-box. For example, let's clear the Enabled check-box next to the Low Power threshold. As a result, the threshold icon will be marked yellow  (i.e. as a changed one) both in the Thresholds panel and in the Data sets panel. Finally, click
  Commit Changes to save changes to the threshold. Now, the Low Power threshold will be excluded from the list of "potential" thresholds "waiting" for being executed.
Note. If the threshold is assigned to a number of data items in various data sets (e.g. Wind speed too low), on clearing the Enabled check-box, it will be excluded from execution in all data sets for all assigned data items (e.g. Links Count=5).
As already mentioned earlier in this section, sometimes complicated conditions are applied for generating thresholds. In this subsection we will illustrate such configuration based on the example. So first of all, we have to create a threshold. For more detail instructions on basic steps to take for creating a threshold, see Creating a threshold discussed at the beginning of this section.
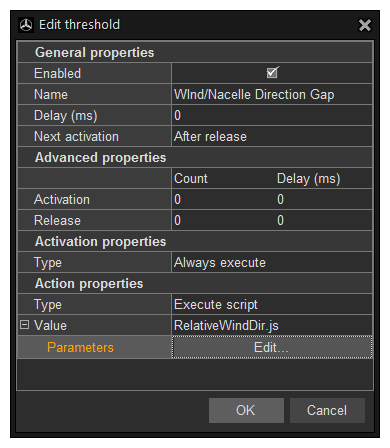
The screen below shows that we have created a threshold called "Wind/Nacelle Direction Gap". As this threshold is meant for calculating the difference in values, the following configuration is applied in the Edit threshold dialog.
Activation properties
Selected Type : Always execute - This option will initiate permanent calculation of values difference based on received online data.
Action properties
Selected Type : Execute script - This option results in execution of the selected script.
Selected Value: RelativeWindDir.js is required for configuring script parameters.
Please note, that parameters shown in the Parameters dialog are pre-defined and depend on the prior selected script.
As soon as configuration in the Edit threshold dialog is complete, click Ok to save your settings. Afterwards, click  Commit Changes to save changes made to the threshold. As a result, the new threshold will pop up in the Thresholds panel at the bottom of the main window.
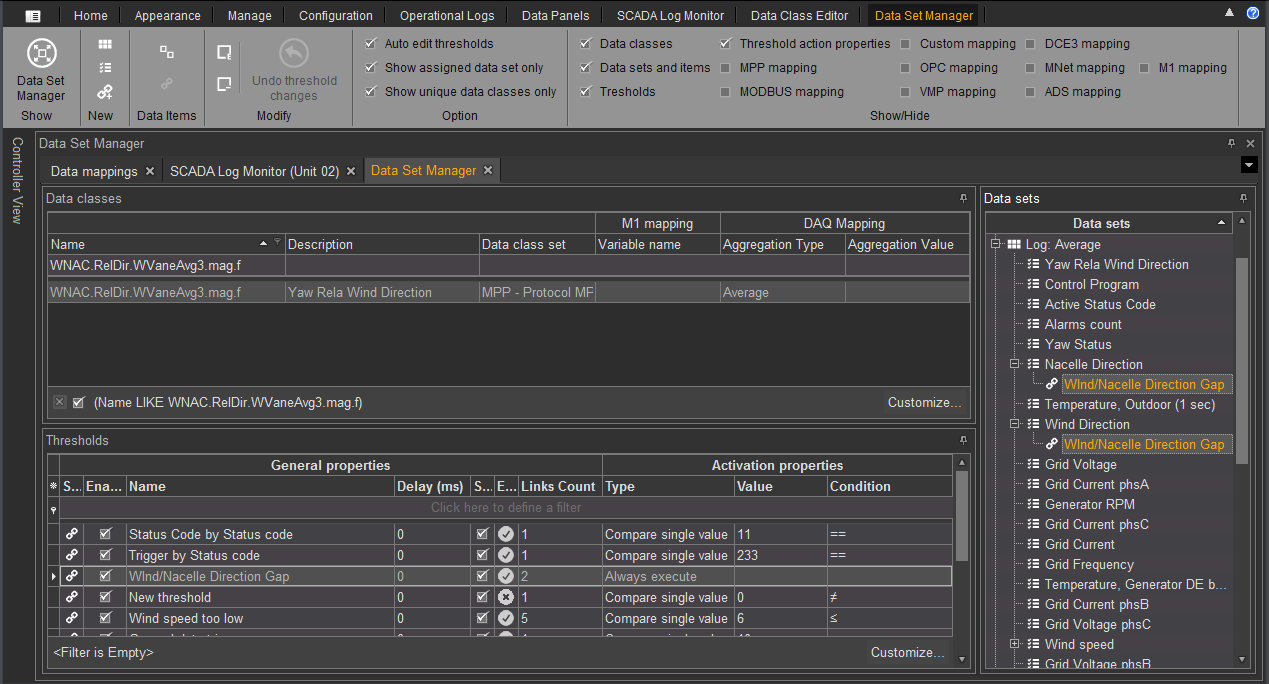
Next thing to do is to assign the created threshold to the corresponding data items. As we're going to calculate the difference between nacelle and wind direction values, the threshold must be assigned to the two data items - Wind Direction and Nacelle Direction correspondingly. This configuration is shown in the previous screen.
Now that the threshold is assigned to the data items, we can configure its parameters. Therefore, double-click or right-click the threshold to open the Edit threshold dialog. Next, press Edit.. button. In the revealed Parameters dialog, make the following configuration settings as shown in the screen below:
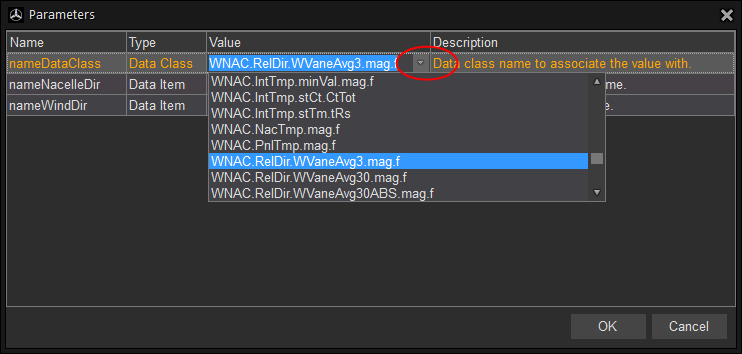
Note. The value column next to the Data Class type lists all data classes available in the data base.
To proceed with threshold configuration, specify the data items from which controller's data will be used for the calculation.

Note. The value column next to the Data Item type lists all the data items, to which the threshold is currently assigned.
As soon as configuring of threshold is finished, click  Commit Changes to save recent settings.
Additional pre-configuration steps for the threshold being configured
To be able to view how data are calculated based on the configured threshold, make sure that the following conditions have been met:
1. Make sure that the corresponding data item (e.g Yaw Relay Wind Direction) has been added to the prior selected data set (e.g. Log: Average). The example illustrating proper configuration is shown in the screen below.
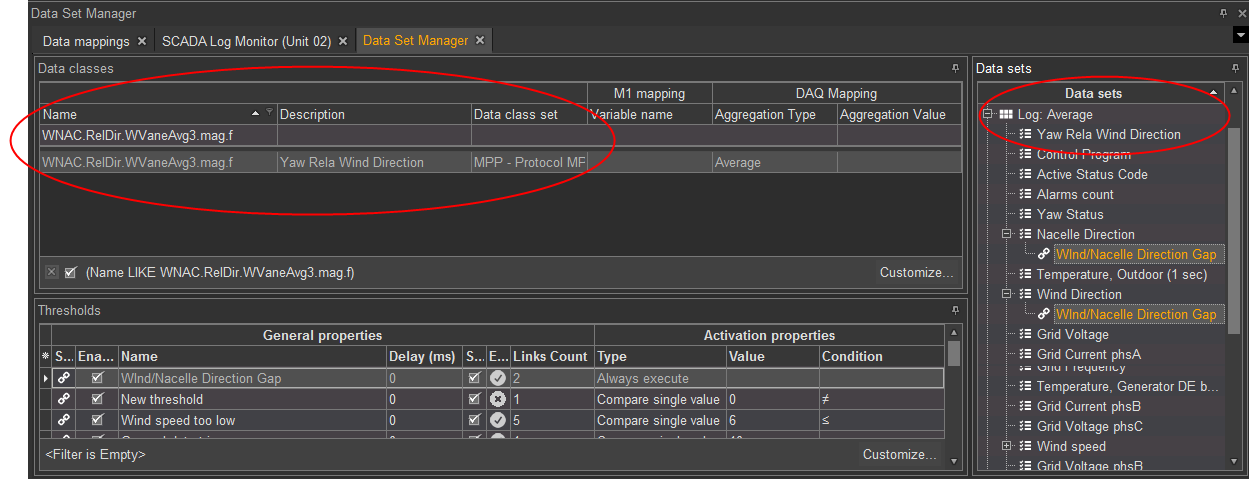
2. Next, you also have to make sure that the corresponding mapping is available in the mapping set (e.g MPP - Protocol MPP) assigned to the selected controller.
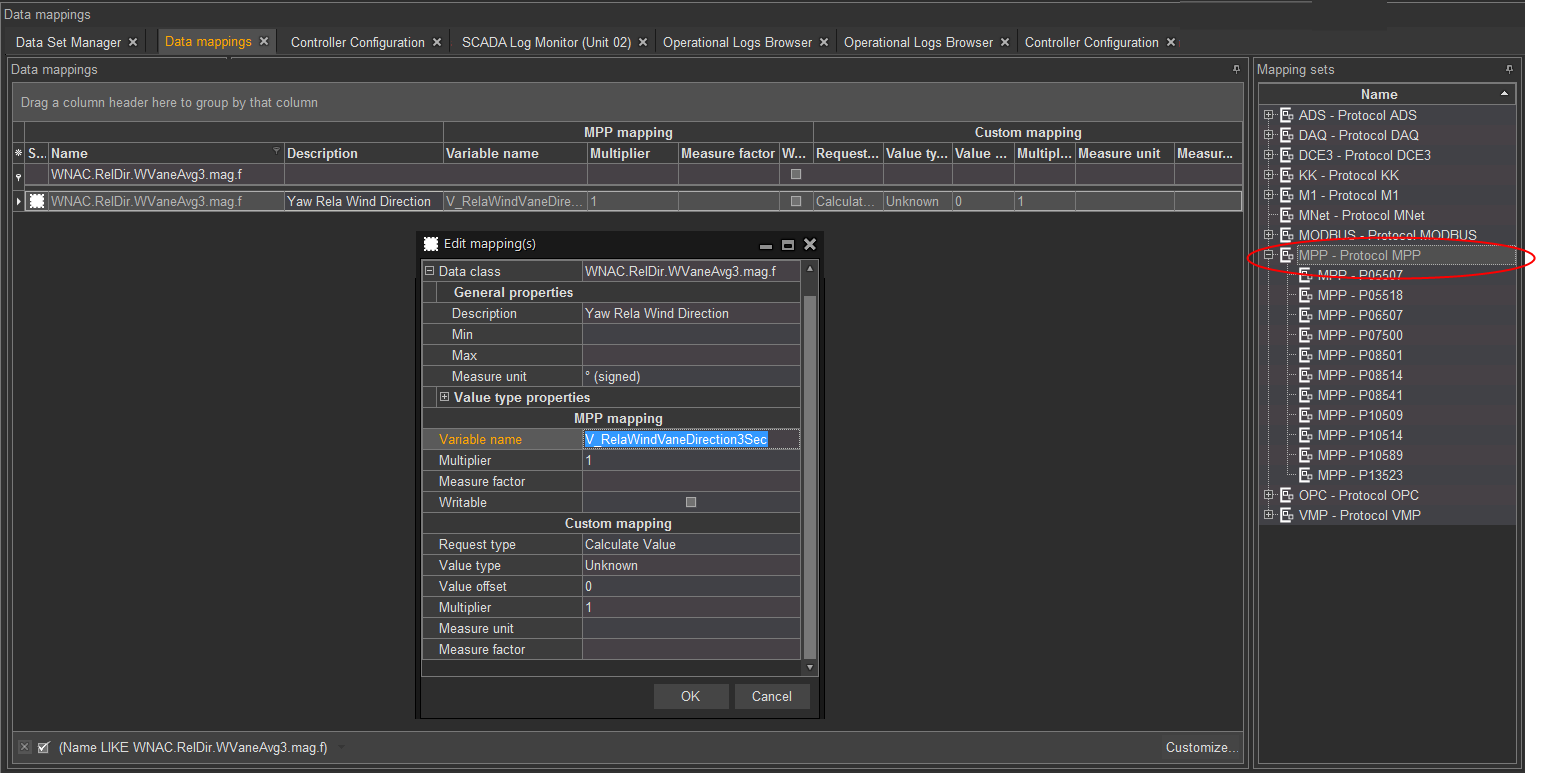
3. Finally, proper configuration settings are obligatory in the Controller Configuration dialog for the prior selected controller.
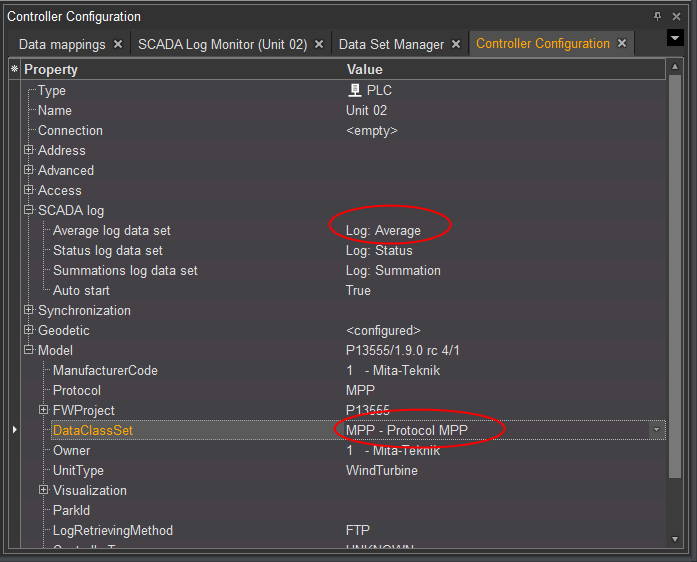
SCADA log
Log: Average - The selected data set must correspond to the one, to which the threshold has been prior assigned (see Additional pre-configuration steps for the threshold).
MappingSet
MPP - Protocol MPP - The selected mapping set must correspond to the one configured for this threshold (see step 2. in Additional pre-configuration steps for the threshold).
In case all preliminary configuration is fulfilled, you can open the SCADA Log Monitor to view data calculation based on the configured threshold.
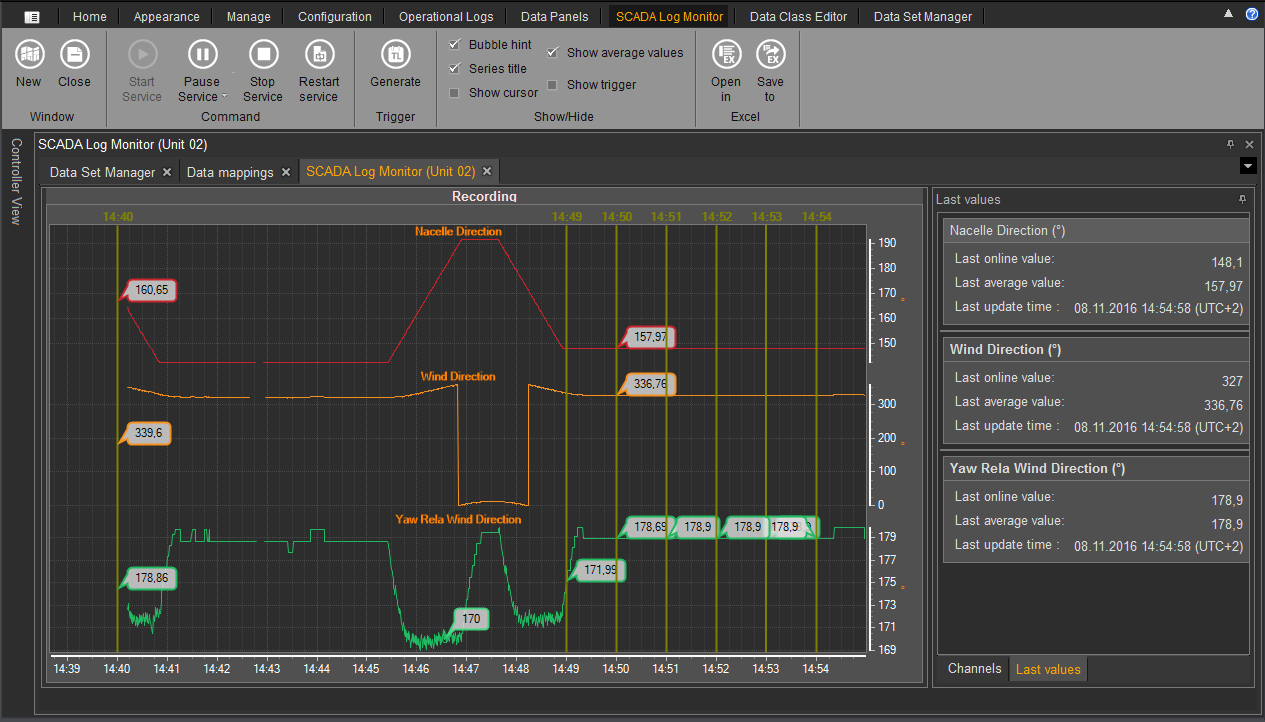
As seen on the screen above, Nacelle Direction and Wind Direction show corresponding online data, whereas Yaw Relay Wind Direction calculates and shows the difference in values between the two channels.
Editing a threshold
All thresholds created in the Data Set Manger can be changed or, if required, deleted form the data base with the help of the Edit threshold dialog.
There are two ways, to reveal the Edit Threshold dialog:
either double-clicking the threshold name/icon or
right-clicking the threshold, opening the context menu and selecting the Edit Threshold option:
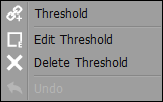
Other options in the context menu allow a user to perform the following actions:
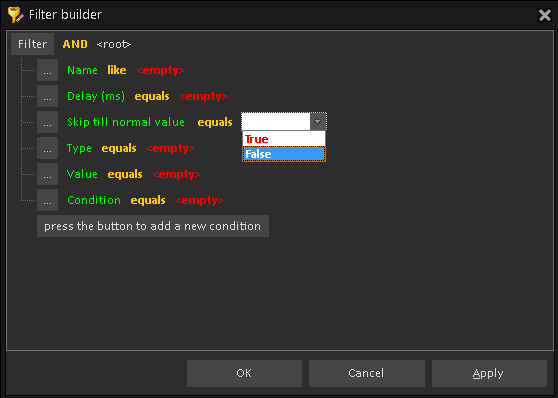
In case a big number of thresholds is available in the database, a user is free to filter them based on the specified parameters. To open the Filter builder dialog, click the  Customize... icon. To proceed, specify the required filtering criteria. Afterwards, click OK to activate filtering.
